 Vidova
Bring in your media
Attach files to the home prompt or to chat, choose Add files in Assets, or upload them through the Library. Common supported formats include MP4, MOV, MKV, and WebM video; MP3, WAV, AAC, M4A, FLAC, and Ogg/Opus audio; and PNG, JPEG, and WebP images.
Watch the upload tray for progress. Transcription, tracking, and other analysis need prepared media; a cloud export also needs the files uploaded. Wait for those steps to finish before starting the next task.
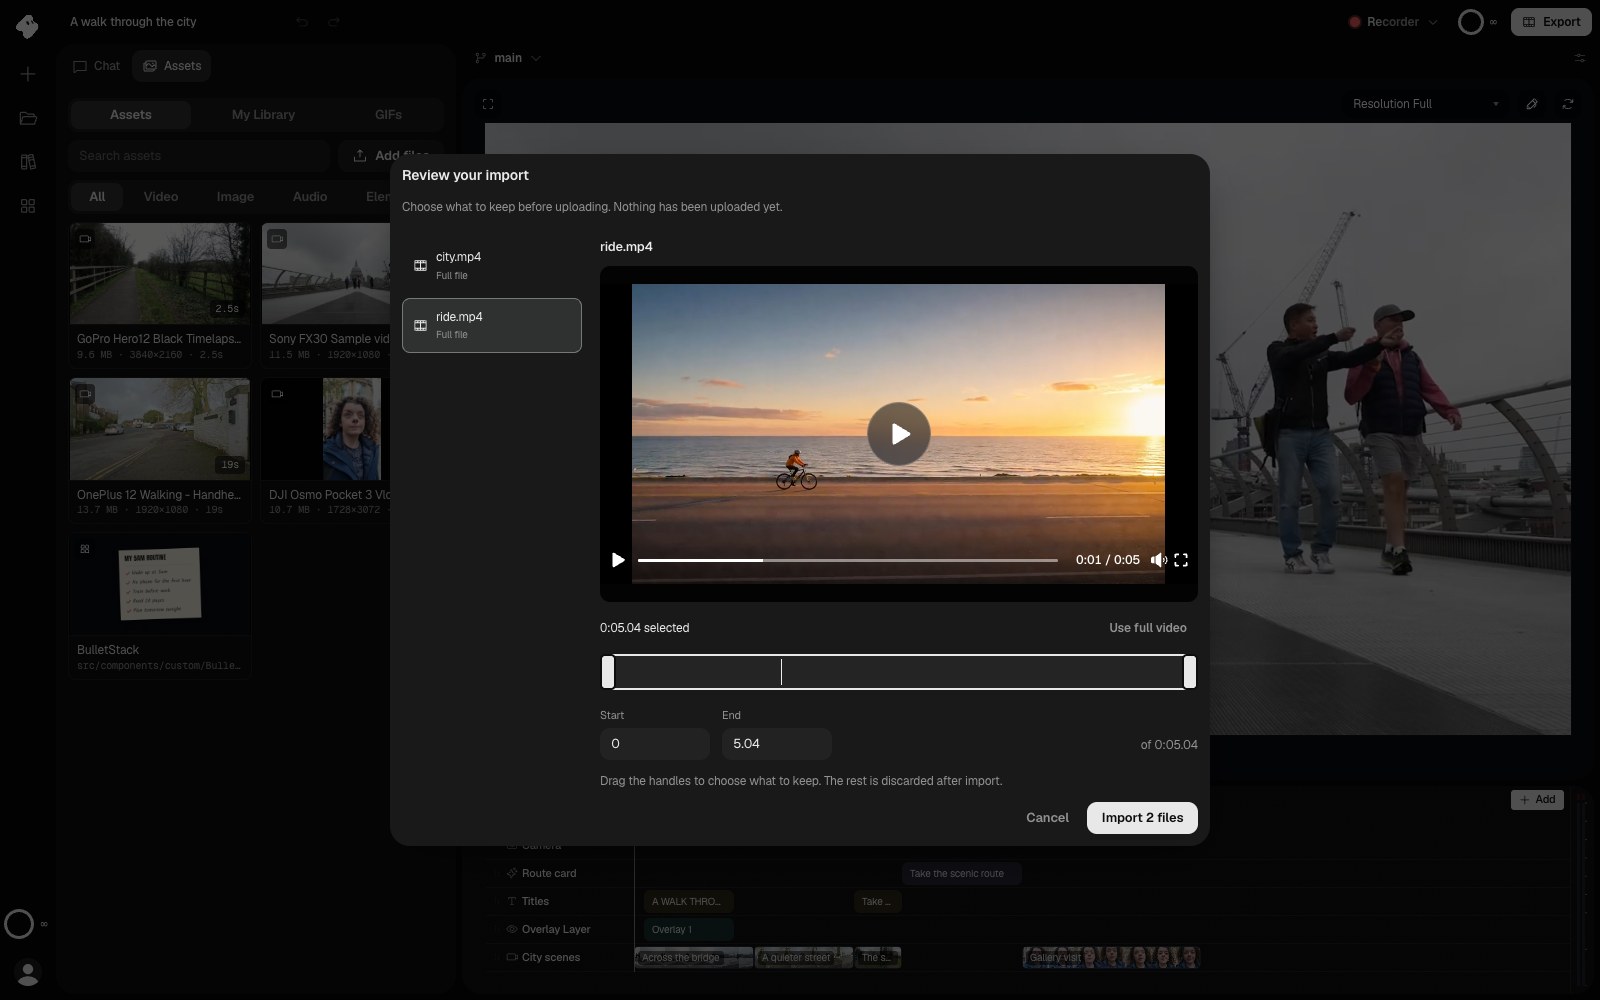
Review the local files before confirming the upload. Choose the range to keep, or import the full file.
Select the image to open the original full view.
Assets and Library
Assets shows what belongs to the open project. Its My Library tab, and the Library page outside the editor, show media saved to your account so you can add it to another project without uploading it again. The GIFs tab finds animated GIFs to add to the project.
In Library, search by name, filter by kind, or sort by date, name, or size. The Not in a project view helps you find unused media. The Trash view holds trashed items.
To put an asset on the timeline, point at its card and choose +, or right-click the card and choose Add to timeline. The clip goes in at the playhead. You can also drag the card onto the timeline, or tell chat which asset to use, which part of it, and where it belongs.
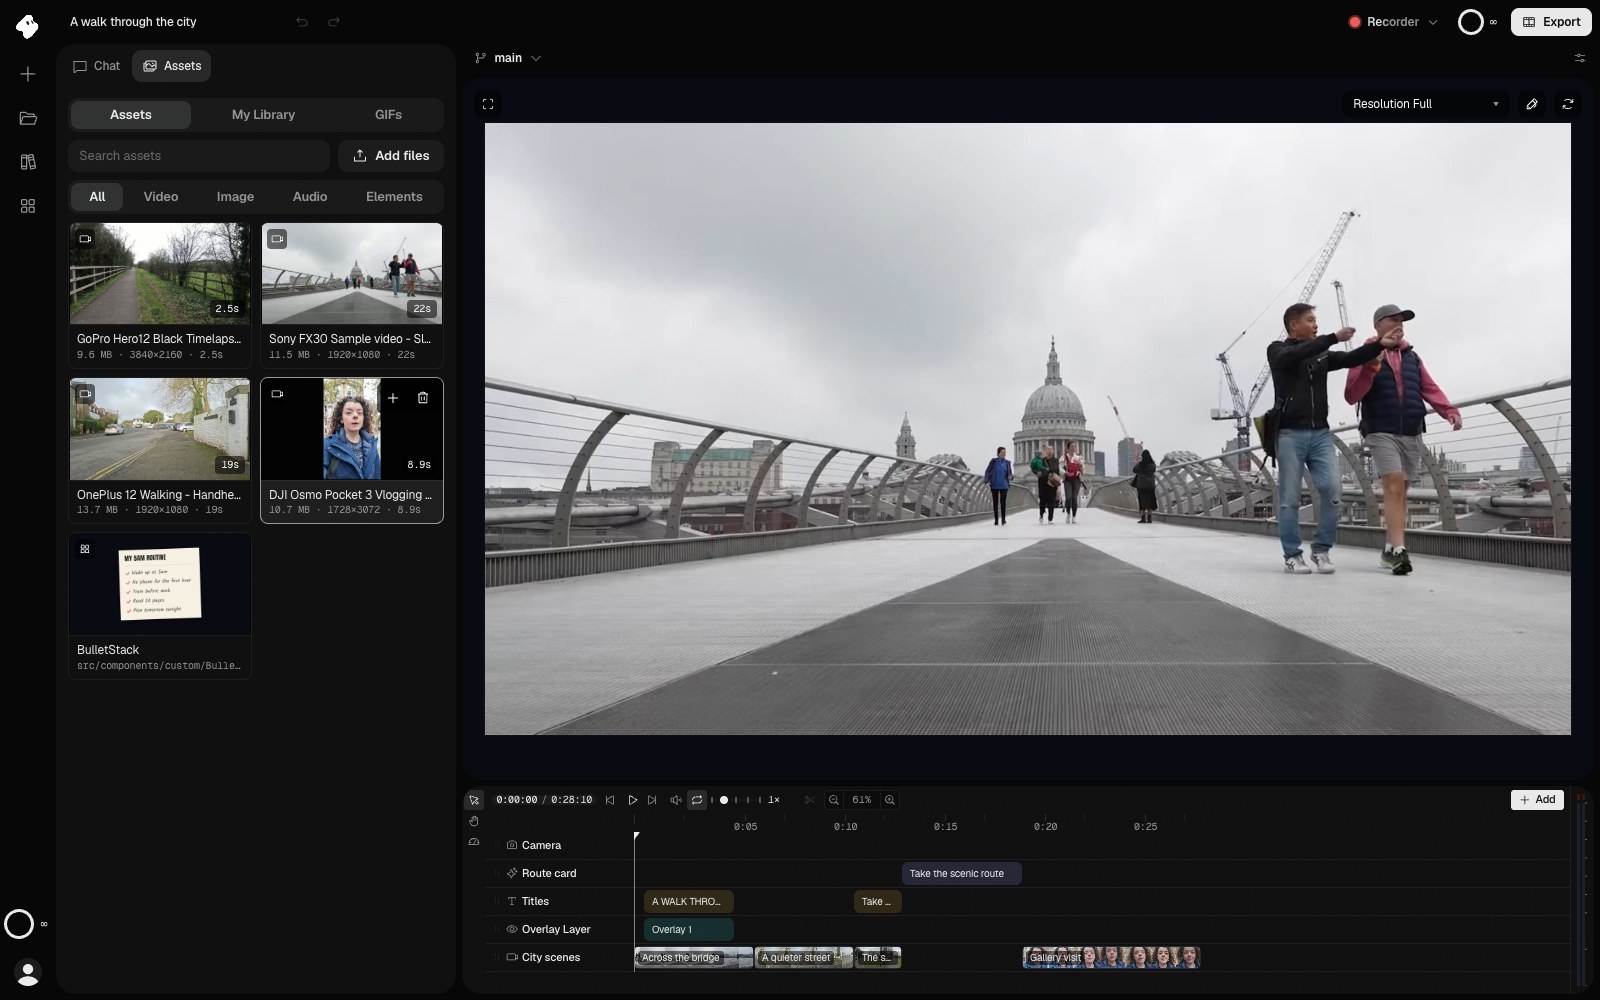
Assets holds the footage and elements in this project. Point at a card and choose + to put it on the timeline at the playhead.
- Add puts a clip of this asset at the playhead.
Select the image to open the original full view.
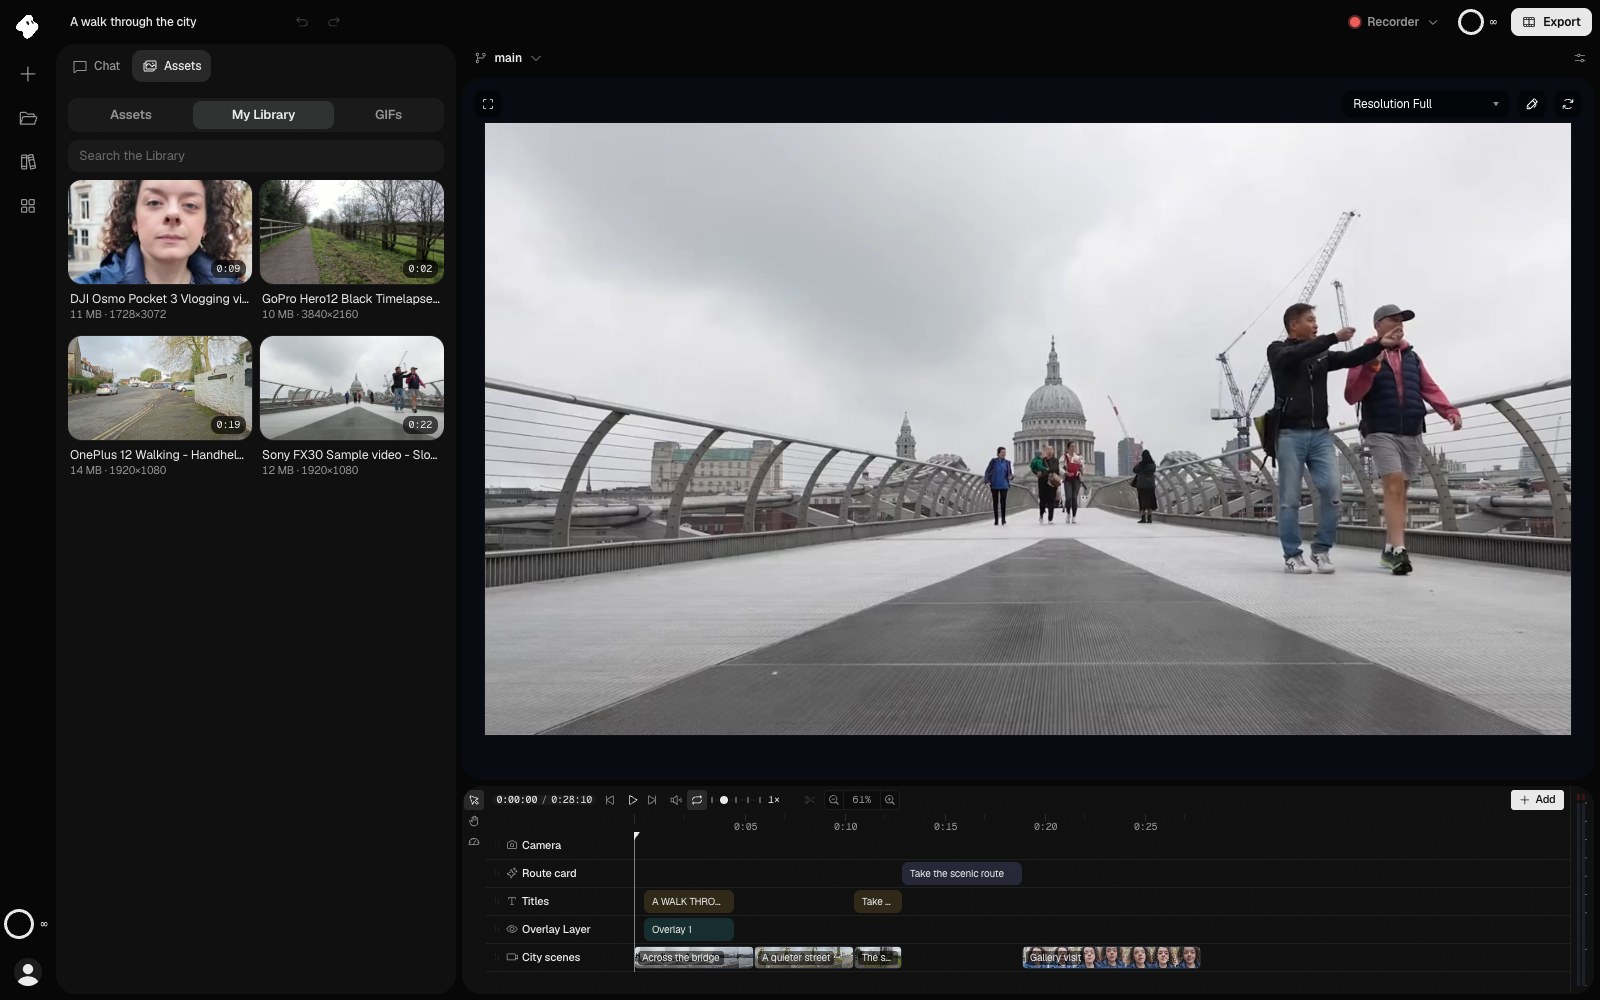
Use My Library to reuse an account upload in the open project. It is separate from the published elements catalog.
- My Library lists your account’s uploads for reuse in this project.
Select the image to open the original full view.
From the timeline, Add → Media from this project shows the same media and elements in one window. Select one to put it at the playhead.
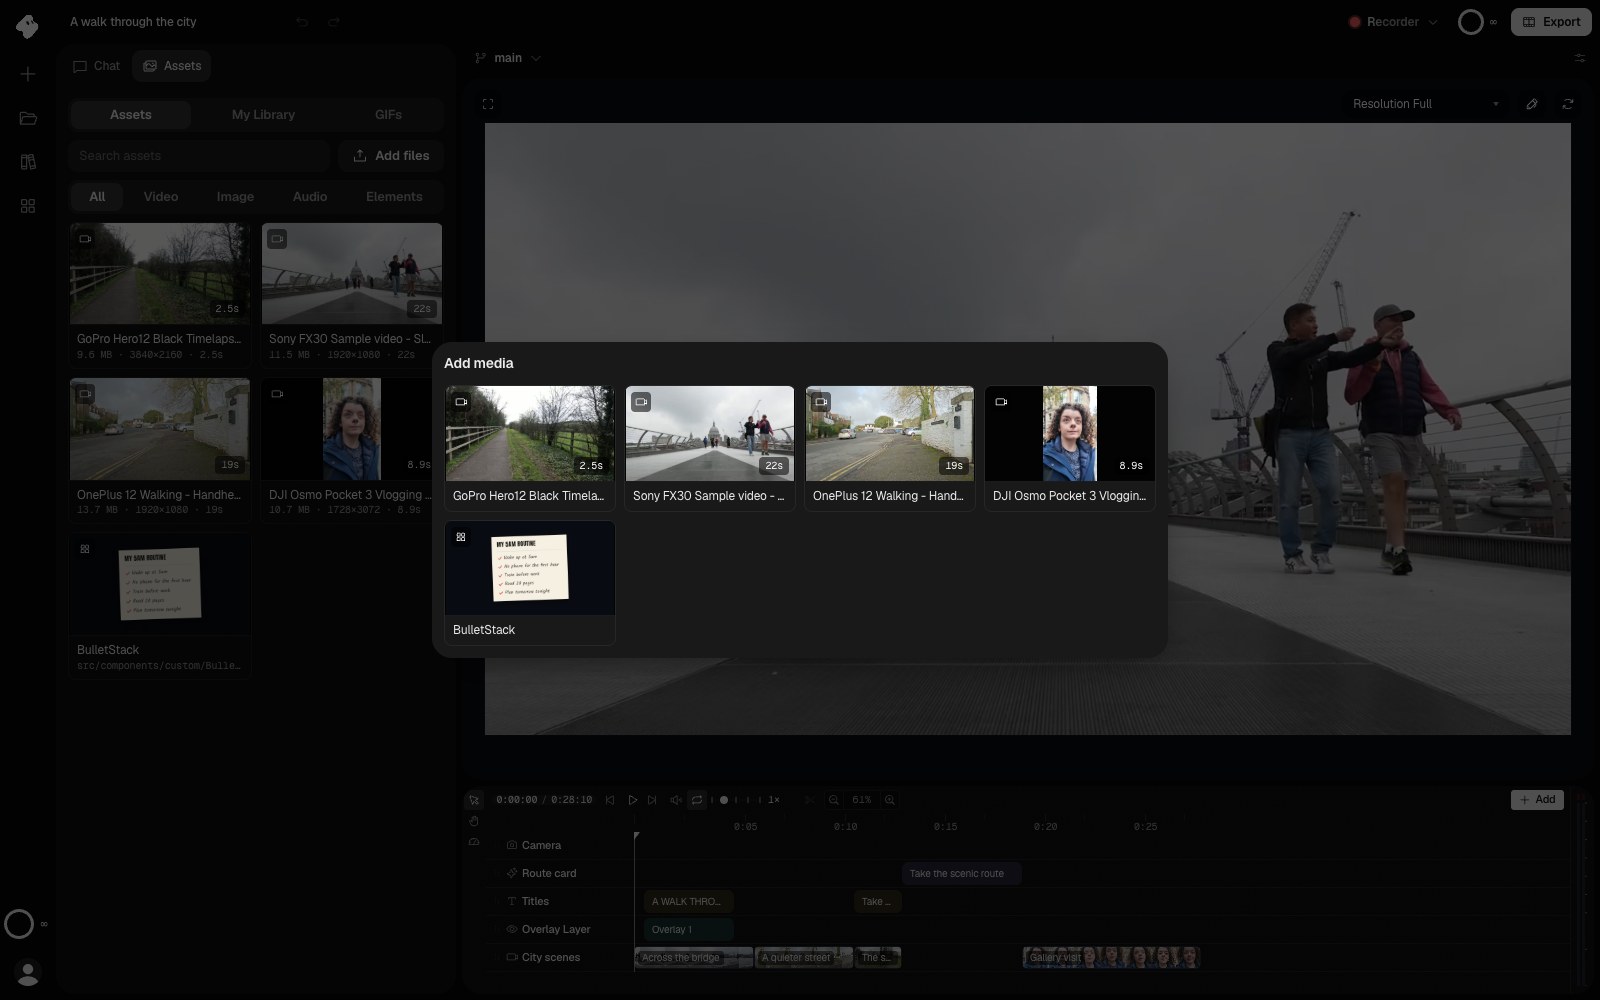
Select a video, image, sound, or element to put a clip of it at the playhead.
Select the image to open the original full view.
Find moments in footage
Video Intelligence can search indexed Library videos using descriptions such as “a person laughing” or “ocean waves”. Results point to times in the source video. Indexing, moment searches, and video analysis are part of the message you send.
In the Library, describe a moment in AI search and press Search. The best match plays first, and each moment in the list plays when you point at it. Use the arrow keys to move between moments, Space to play, and X to select. Select the moments you want, then press New project. A new project opens with them in the prompt box. Write what to make and press Start. The agent cuts the parts you picked.
Eligible paid accounts can automatically index new uploads; the automatic indexing setting can be changed in settings. A video must finish uploading before indexing can complete. Footage can still be edited without being indexed.
Try a request such as “Find the shot where the door closes in the house tour, then use that moment as the ending.” For upload ranges, reuse, and restoring deleted files, see Your Library.
When media is not ready
Open the upload tray to see whether the file is uploading, preparing, or has failed. A file that is available only on this device must finish uploading before cloud features can use it. If preparation has failed, resolve that upload before requesting an effect or export.
For a problem that persists, contact support with the build code from Settings → About. See FAQ.