 Vidova
Sign in with your Vidova account
When an MCP client connects, it opens Vidova’s sign-in flow at auth.vidova.ai. Use the same account as the web editor so the agent sees the projects and Library you expect.
Complete the sign-in flow and return to your client. Your client stores the credentials for its connection. Complete the client’s own sign-in even if you are already signed in to the Vidova website.
Check the connected account
Ask your agent to call whoami to confirm the account, then list your projects. If a project is missing, compare that account with the one shown in the web editor.
The remote server address is https://mcp.vidova.ai/mcp. The browser handles sign-in on the separate authentication host; enter the MCP server URL in your client’s server configuration.
Manage and revoke connections
Open Settings → MCP to see connected clients and their last recorded activity. Choose Revoke for a connection you no longer want to use.
To reconnect a revoked client, start its authentication flow again. Removing a client from your local configuration and revoking its Vidova connection are separate actions.
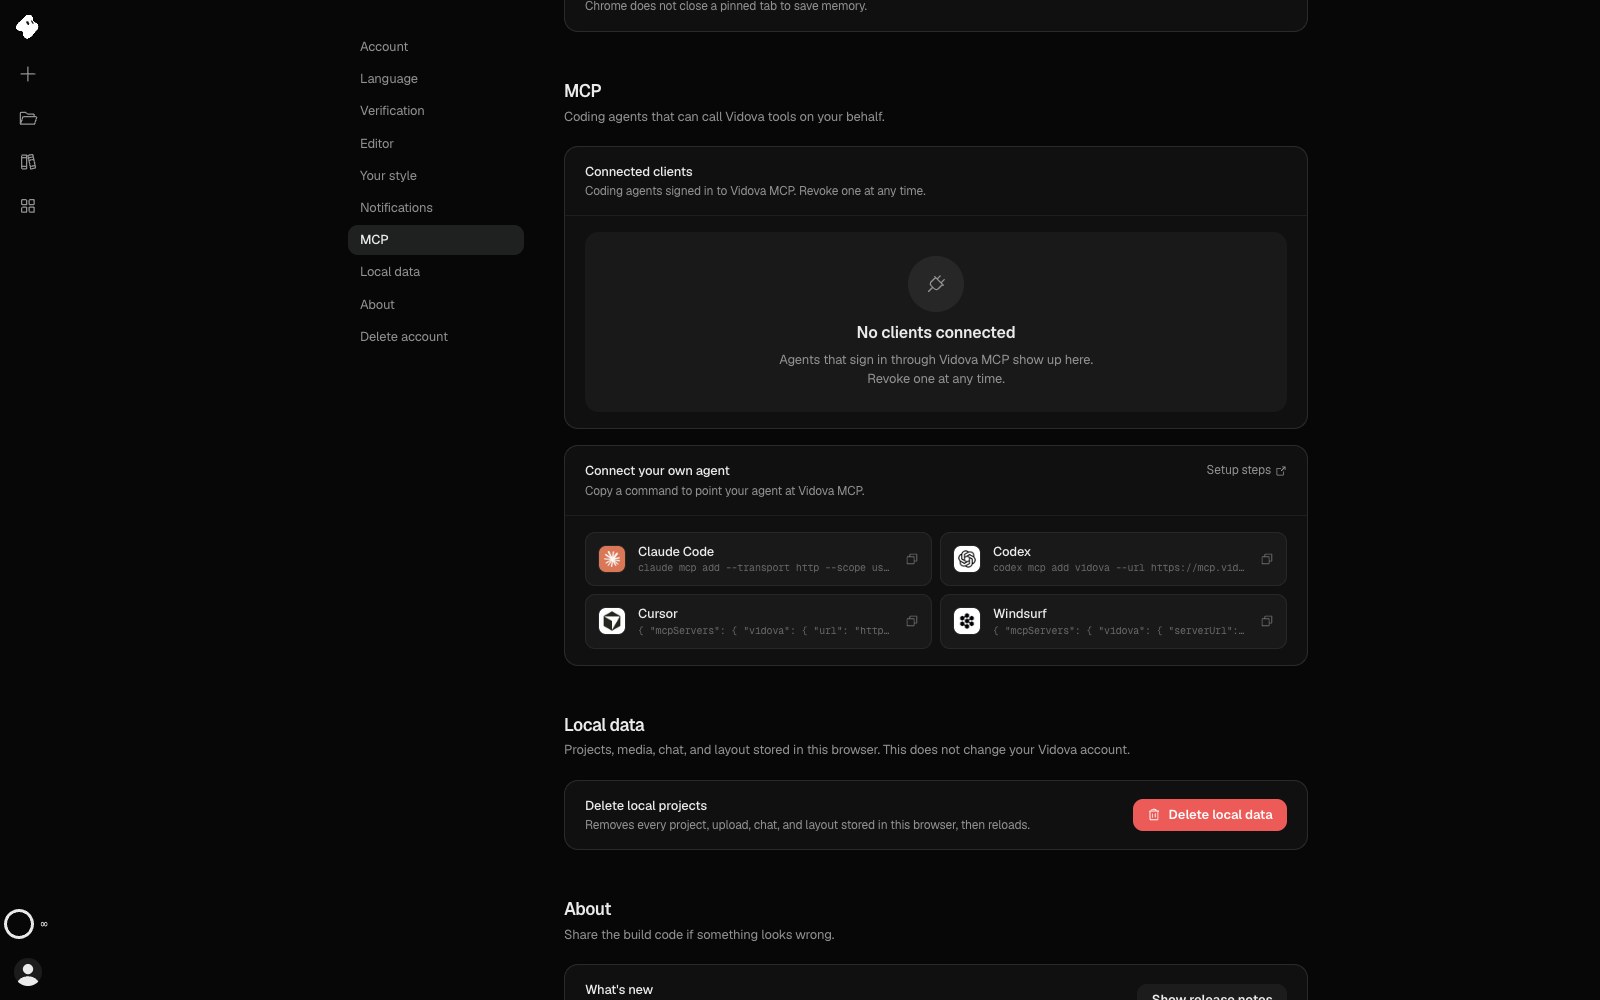
MCP settings combines client setup with access management. This demo account has no connected external clients yet.
- Agents you sign in through Vidova MCP appear here. Revoke one at any time.
- Copy the command for your agent to connect it to Vidova.
Select the image to open the original full view.
If connection or access fails
- Check that the server URL ends in
/mcp, or in/claudefor the Claude connector. - Finish the browser sign-in opened by the client.
- Confirm the connected account with
whoami. - Ask the agent to list and open the intended project before editing.
- Check the account’s credit balance if authentication works but an operation is refused.
If the connection still fails, contact contact@vidova.ai with the client name and any error reference provided.