 Vidova
Install the terminal recorder
The Vidova CLI records your screen, saves portable tapes, and uploads recordings to a Vidova project. Install it with Node.js 20 or newer and npm:
npm install -g @vidova/cli
vidova --version
vidova --help
The published CLI includes native packages for macOS on Apple Silicon or Intel and Windows x64. The examples here were captured with CLI 3.0.2 on macOS. Linux requires the separate source-build setup; do not assume the npm install includes a Linux recorder binary.
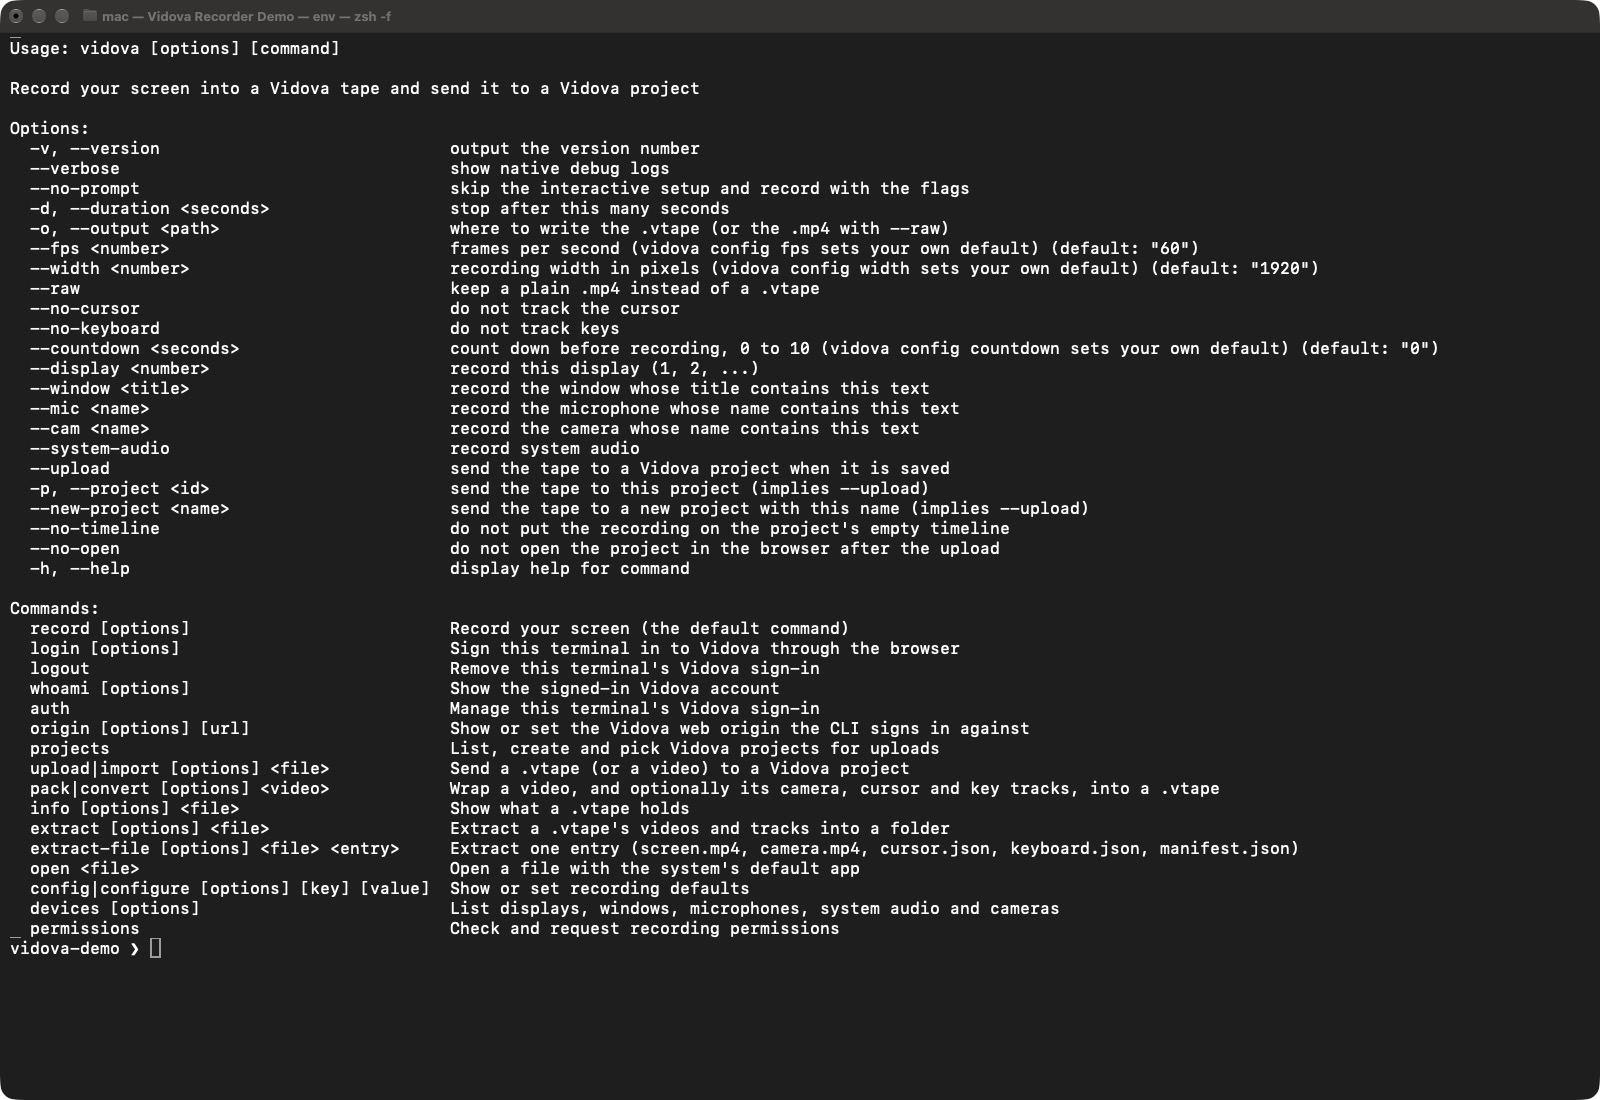
Use --help to check the commands and flags in your installed CLI. This capture uses version 3.0.2.
Select the image to open the original full view.
Choose the command for the job
| Command | Purpose |
|---|---|
vidova or vidova record | Open interactive recording setup. |
vidova devices | List available displays, windows, microphones, audio devices, and cameras. |
vidova permissions | Check and request recording permissions. |
vidova config | Show or change recording defaults. |
vidova login, whoami, logout | Manage this terminal’s account connection. |
vidova projects | List, create, and choose an upload project. |
vidova upload | Send a recording to a project. |
vidova pack, info, extract | Create, inspect, and unpack tape files. |
Add --help to a command for its options. Start with Record from the terminal, then use CLI sign-in and uploads when you want to send the result to the web editor.
Save your preferred capture settings
vidova config
vidova config fps 30
vidova config width 1920
vidova config countdown 3
vidova config no-keyboard true
The built-in defaults are 60 fps, a 1920-pixel recording width, and no countdown. You can also set raw, no-cursor, and output-dir. Set a Boolean option to false to turn that saved option off. Use vidova config --reset to clear all custom recording defaults.
Explicit frame rate, width, and countdown flags override the saved values for that command. With no output path configured, recordings go to ~/.vidova/recordings/. VIDOVA_HOME selects a different CLI data directory, including its configuration and sign-in state.
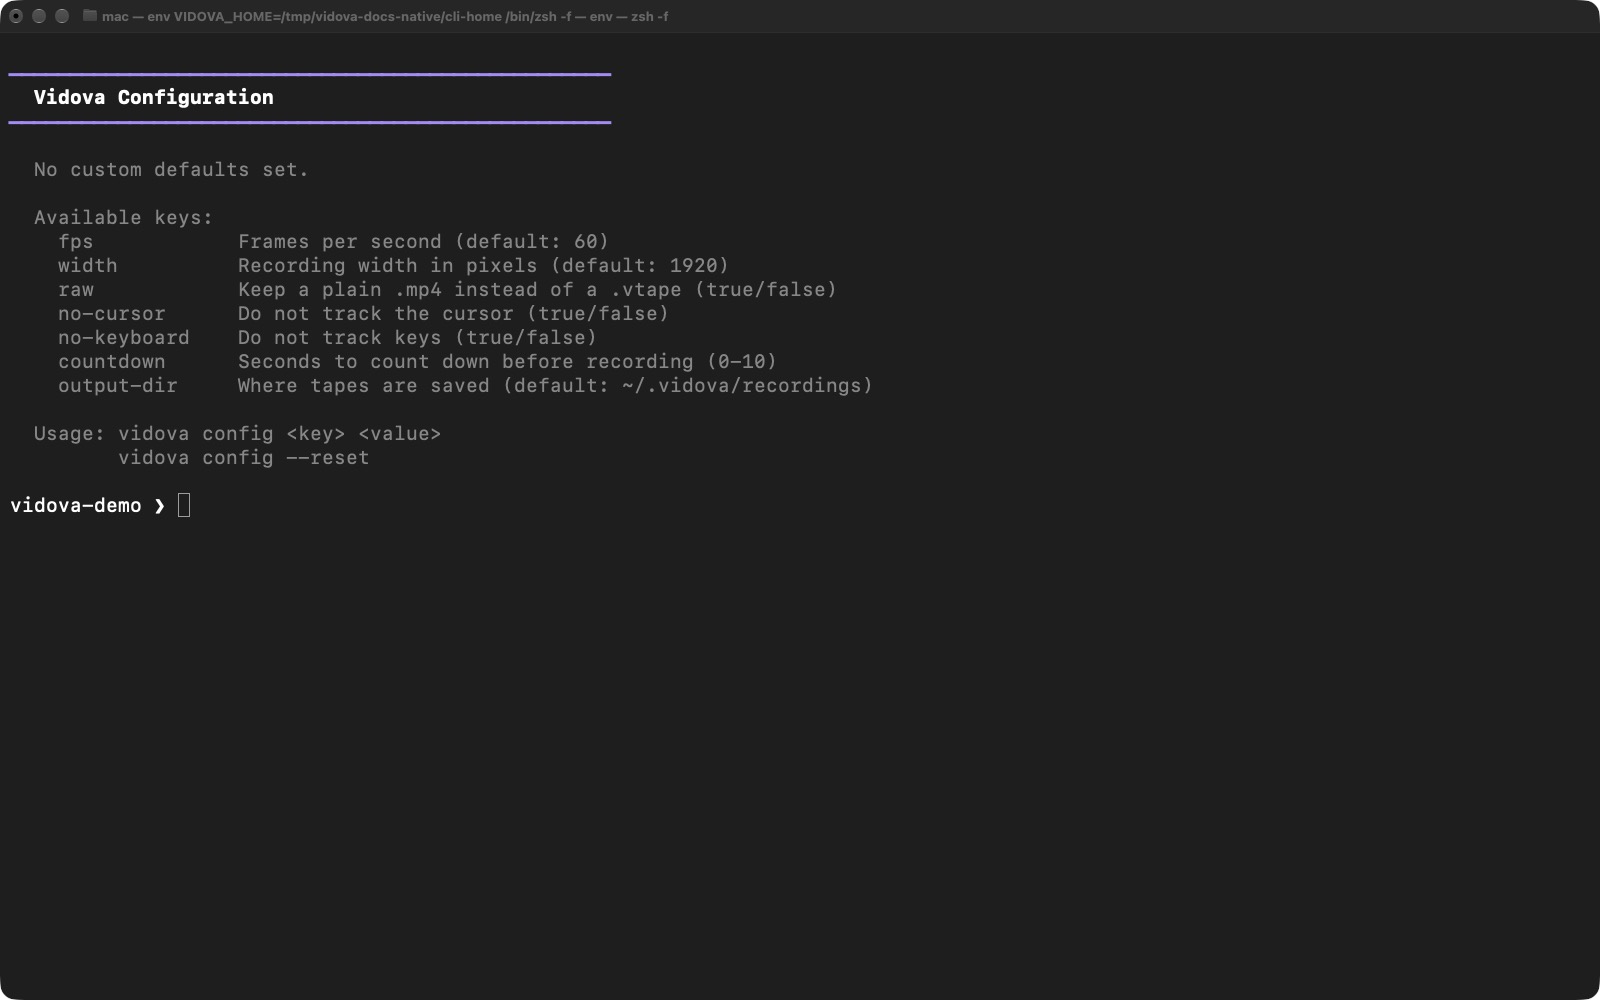
No custom defaults are saved in this isolated demo profile. Set individual values or reset all custom defaults.
Select the image to open the original full view.
Connect an agent separately
The CLI is for recording and file delivery. To let an external AI client edit a Vidova project, connect the remote MCP server using https://mcp.vidova.ai/mcp. Installing the CLI does not connect an MCP client.