 Vidova
When to make a custom component
A custom component is useful when a recurring graphic needs behavior beyond a text clip or an existing element’s controls. Examples include a branded scorecard, a data display, an animated diagram, or a callout that follows analysis from footage.
Check the published Elements and components first. If an existing element already fits, changing its inputs is usually enough. Use custom source when the layout or behavior itself needs to change.
Give the agent a reusable design brief
Describe the content, appearance, animation, duration, and controls you want to reuse. Include the target aspect ratio and where the graphic should sit relative to footage.
Create a reusable route card with a heading and three stops. Reveal the stops in order, hold the completed card, then fade it out. Expose the heading, stop names, background color, and accent color as inputs. Make it work in both landscape and portrait projects.
Ask the agent to place the result in the film and show a preview. A component saved to the project still needs a timeline clip before it appears in the video.
Decide what varies per clip
Expose words, numbers, colors, and media choices as inputs when you expect to change them between uses. Set those values under Inputs in the Inspector. Link compatible fields to Project variables when several uses should change together.
The component’s source defines the behavior shared by its uses in the project. Changing one clip’s input customizes that instance; changing the source can affect every clip that uses the component. Make an alternate version before a substantial redesign.
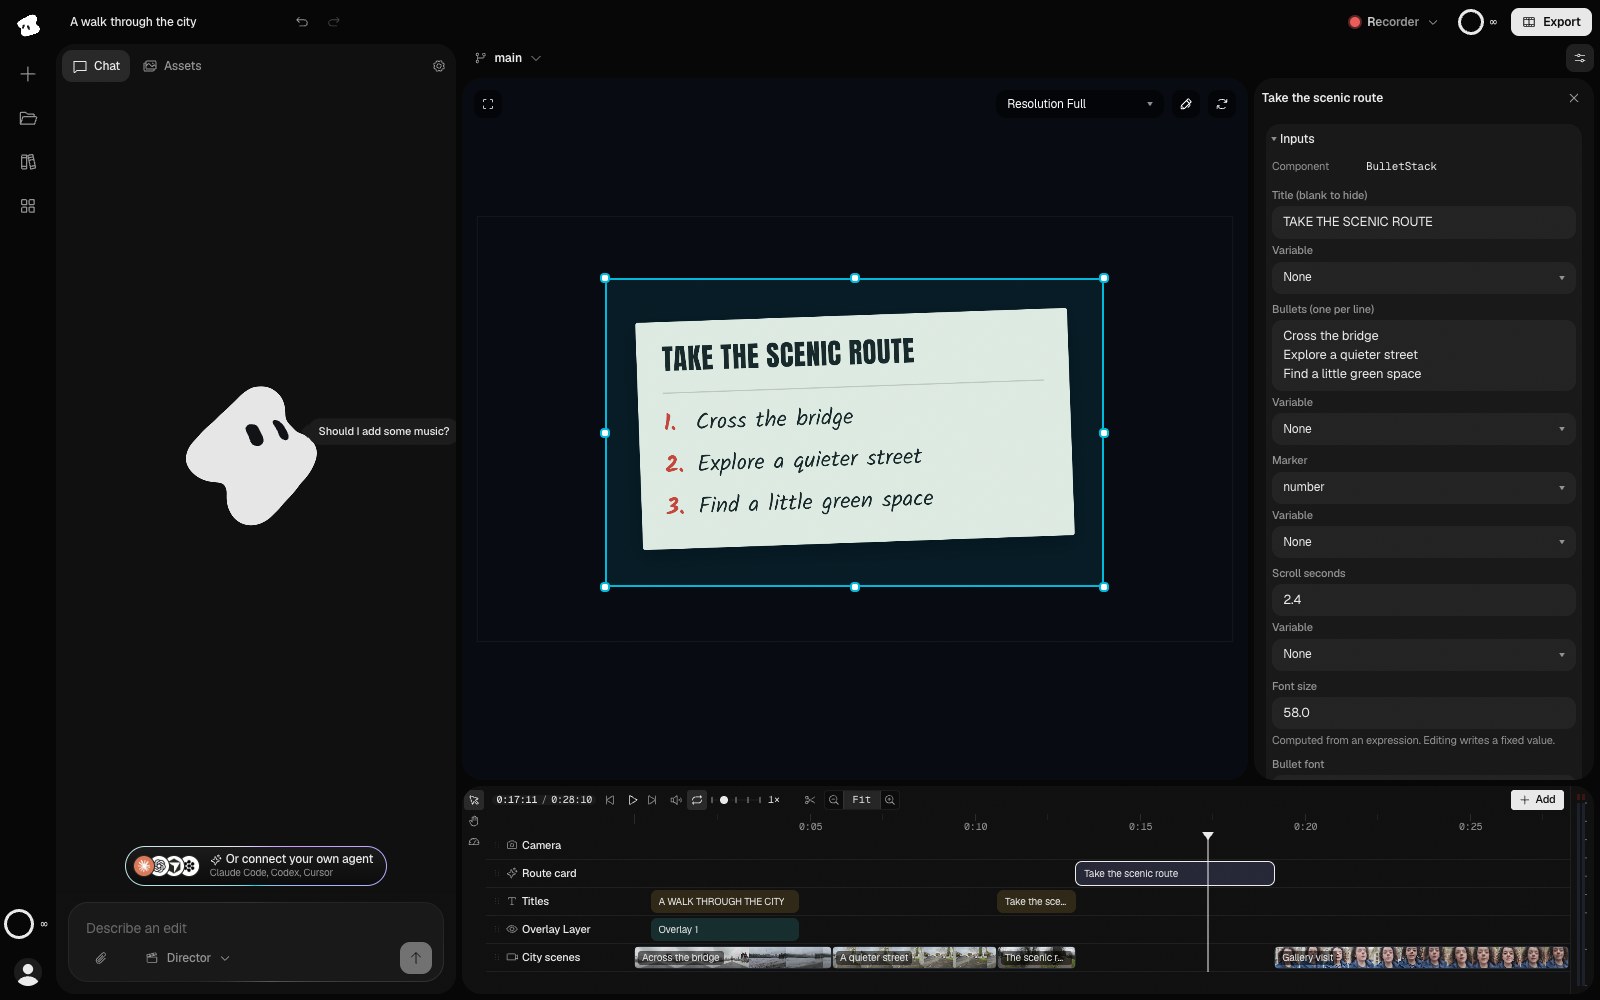
Inputs customize this instance of Bullet stack. The separate preview image below shows the finished composition with the Inspector closed.
Select the image to open the original full view.
For authors working with source
Ask the agent to show or change a component’s source. A connected MCP client can read and replace it with read_component and replace_component. Custom components use TypeScript with JSX and Vidova’s @vidova/2d and @vidova/core packages. The exported class name must match the component name.
Write animation as atTime(time, duration). Time is seconds since the clip’s start. Each call must set the animated state for that time, so scrubbing backward and jumping forward produce the right frame without playing earlier frames first. A positive defaultDuration supplies the duration for standalone previews.
Generator methods such as animate(), yielded tweens, and waiting between steps do not drive timeline animation. Compute progress from time and set the resulting values directly.
Use typed media and analysis inputs for footage, transcripts, beats, audio, and tracking results. Ask the agent to bind the actual project asset or saved result; a filename typed into a text input is not a media binding.
Review more than one frame
- Scrub the entrance, the held composition, and the ending.
- Jump backward to verify that the same time produces the same appearance.
- Try a longer heading and the shortest intended clip duration.
- Check the project’s actual aspect ratio and a small preview.
- Close the Inspector and inspect the full frame, then check an export before delivery.
If the component fails to compile, resolve that failure before using it. If it compiles but looks wrong, identify the time and input values that reproduce the problem. See FAQ for reporting a problem with diagnostics.